
# Playing with Kubernetes for the First Time
04 May 2018
 For a while now, I’ve been interested in learning a container orchestration technology called Kubernetes, which was developed by Google and licensed under the Apache License 2.0. I’ve been working through the “Learn Kubernetes using Interactive Browser-Based Scenarios
“ on Katacoda, which is a free online way to learn some new technology without a large personal investment. I wanted to play around without the constraints of a course, so I decided to spend a few dollars on bare-metal hosting resources on packet.net. They gave me $25 worth of free introductory credit so I didn’t even pay anything for this exercise. Packet.net has an offering called
For a while now, I’ve been interested in learning a container orchestration technology called Kubernetes, which was developed by Google and licensed under the Apache License 2.0. I’ve been working through the “Learn Kubernetes using Interactive Browser-Based Scenarios
“ on Katacoda, which is a free online way to learn some new technology without a large personal investment. I wanted to play around without the constraints of a course, so I decided to spend a few dollars on bare-metal hosting resources on packet.net. They gave me $25 worth of free introductory credit so I didn’t even pay anything for this exercise. Packet.net has an offering called t1.small.x86 with 8GB RAM, 80GB disk (the one I ordered actually came with a 150GB Intel SSDSC2BB15), and an Intel Atom C2550 processor. I ordered one in Parsippany, NJ as that was the closest location to me. Bandwidth is not limited, but it is billed at $0.05/GB outgoing, which wasn’t an issue. Honestly, the power of dedicated servers is quite remarkable. I previously hosted dylanmtaylor.com on a Joe’s Datacenter dual Xeon machine, and it had great performance. Compared to that, the HostHatch NVMe I have my site running on right now is quite underpowered. That said, the value is certainly there, and it’s been very reliable so far. Anyways, let’s start playing with Kubernetes.
CoreOS was a natural fit for this project. I’ve heard a lot about it, including when I attended the All Things Open conference in Raleigh, NC and met with some of the people working on it. At work I’ve used Docker with the Docker Trusted Registry product quite a bit and realized the power it has to simplify deployments and server as a host for running continuous integration jobs, so I decided to dive right in and rather than installing CentOS like I usually would and installing Docker on top of that, I’d just install CoreOS as a base operating system. I’m still not sure what “Container Linux” means, but it feels like a solid foundation for exploration. From what I’ve seen so far, it’s basically a stable Linux foundation that is “stripped down” compared to more general purpose distributions. It’s purpose built to use very few resources and just get out of the way. Fortunately with packet.net, I didn’t have to do any of the installation work myself, as they provided an OS template that is installed via iPXE on initial bootup.
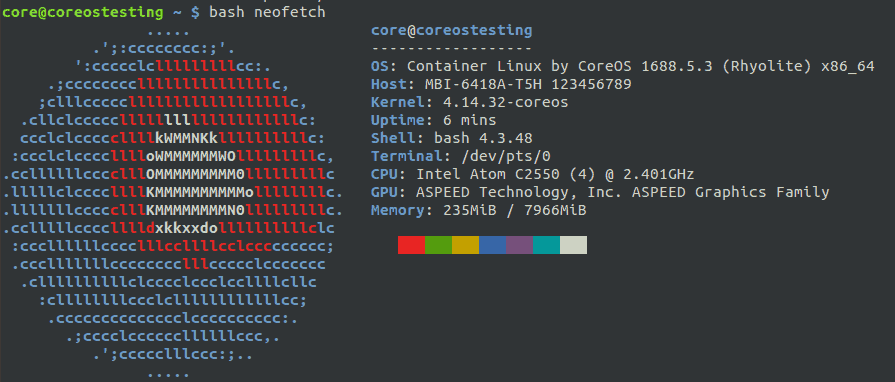
The first thing I did once the server was installed was SSH in and check the hardware out. I also took the opportunity to curl neofetch and run that to get a fancy screenshot for this blog post. I then started reading up on the documentation for Kubernetes and the CoreOS + Kubernetes docs. For the time being, I decided against using Tectonic, as it looks like it is overkill for just testing out Kubernetes, and it looks like a paid product (although I was able to find source code for it). I checked the internet and found a post on Kubernetes and CoreOS on a single node from someone else who went through the same exercise. They took a script originally by Victor Palau and modified it to be more secure and less reliant on Microsoft Azure. After reviewing the kubeform.sh code from the GitHub repository, I decided to test it out on my server. As I was already connected via SSH, I simply had to execute the commands in the README.md file:
git clone https://github.com/m3adow/k8single/;
cd k8single
./kubeform.sh [myip-address]
Unfortunately, I got an error stating Failed to start etcd2.service: Unit etcd2.service not found, so I had to install etcd and get that up and running. Or so I thought, until I discovered that these services were deprecated. Fortunately, I managed to find a blog post explaining how to setup etcd v3 and I was able to start and enable etcd-member.service:
coreostesting core # systemctl enable /usr/lib/systemd/system/etcd-member.service
Created symlink /etc/systemd/system/multi-user.target.wants/etcd-member.service → /usr/lib/systemd/system/etcd-member.service.
coreostesting core # systemctl start etcd-member
coreostesting core # rkt list
UUID		APP	IMAGE NAME			STATE	CREATED		STARTED		NETWORKS
3de95472	etcd	quay.io/coreos/etcd:v3.2.15	running	24 seconds ago	24 seconds ago
Clearly, etcd-member was the right service, and etcd2 is deprecated and removed. Progress! As I learned all I know so far from Katacoda, I decided to try to setup the environment similar to what they had. In particular, I wanted to start by getting kubectl installed on my local system. I was able to track down a tutorial on installing kubectl and the instructions were straight-forward. As I am currently running Ubuntu, I used the snap package that was installed with a simple sudo snap install kubectl --classic.
dtaylor@Dylan-Precision-5510:~$ kubectl version
Client Version: version.Info{Major:"1", Minor:"8", GitVersion:"v1.8.4", GitCommit:"9befc2b8928a9426501d3bf62f72849d5cbcd5a3", GitTreeState:"clean", BuildDate:"2017-11-20T05:28:34Z", GoVersion:"go1.8.3", Compiler:"gc", Platform:"linux/amd64"}
The connection to the server localhost:8080 was refused - did you specify the right host or port?
Of course, it points to localhost by default. It looked rather tricky to make it use the CoreOS server, so I used the curl method to download it onto CoreOS directly. The filesystem was read-only so I kept it in the home directory. I really wanted to get the Kubernetes Web UI up and running. Unfortunately, this didn’t yield any better results:
core@coreostesting ~ $ ./kubectl create -f https://raw.githubusercontent.com/kubernetes/dashboard/master/src/deploy/recommended/kubernetes-dashboard.yaml
W0505 01:03:08.989428    1517 factory_object_mapping.go:423] Failed to download OpenAPI (Get http://localhost:8080/swagger-2.0.0.pb-v1: dial tcp [::1]:8080: getsockopt: connection refused), falling back to swagger
The connection to the server localhost:8080 was refused - did you specify the right host or port?
I searched for this error and was able to find a GitHub issues page describing the error. It suggested I follow these steps:
sudo cp /etc/kubernetes/admin.conf $HOME/
sudo chown $(id -u):$(id -g) $HOME/admin.conf
export KUBECONFIG=$HOME/admin.conf
Sadly, the commands failed, with the source files not existing. After some searching, it seemed like I needed to get Kubelet working. Since the newer documentation relied on AWS heavily, I decided to try the older version. This had some formatting issues so I tried the kublet.service from GitHub. After pasting that in, I ran sudo systemctl daemon-reload; sudo systemctl start kubelet, which didn’t return any output but didn’t work either.
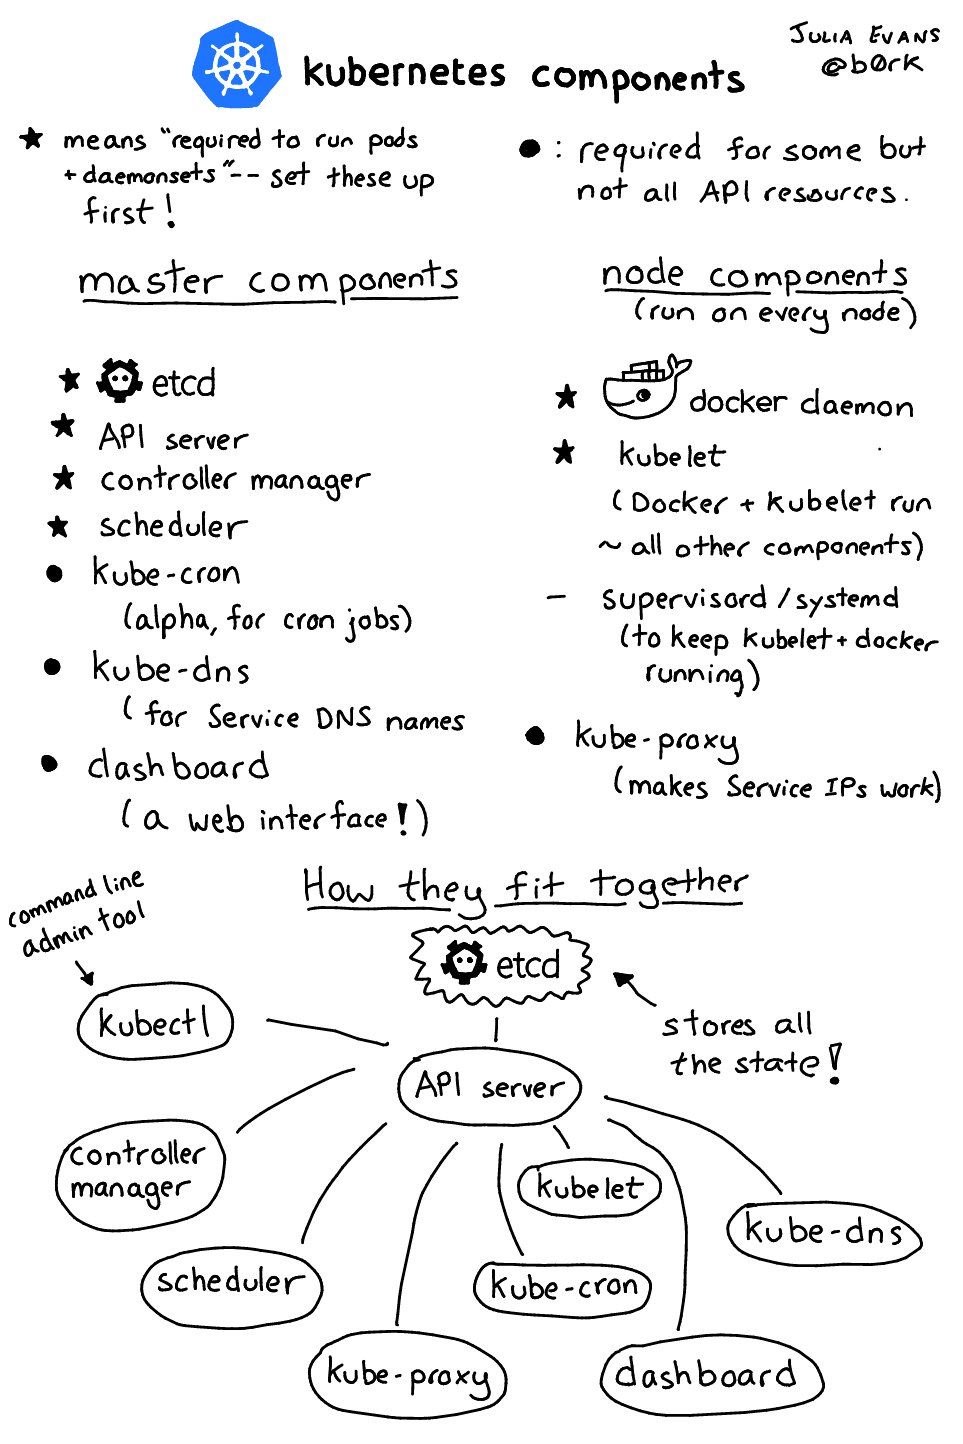
I decided to scrap CoreOS for now after I managed to stumble upon a blog post about setting up Kubernetes on Packet, which I read and found particularly detailed and helpful. It also included a great image by Julia Evans showing how all the pieces fit together. I initiated an OS reload action on the server and reprovisioned it with Ubuntu 16.04 LTS. Packet has a really nice feature called Out-of-Band console which you can use to watch a server get deployed in realtime. Once my server finished provisioning, I got to work. I won’t bore you with too many details, as Alex goes into great detail on his blog, but first, I SSH’d into the newly installed machine as root and turned off swap using swapoff -a and ran the all-in-one dependency installation script.
Once all the dependencies were installed, I ran sudo kubeadm init --pod-network-cidr=10.244.0.0/16 --apiserver-advertise-address=[ip address] --kubernetes-version stable-1.10, where [ip address is the private bond0 address on the physical machine. While not strictly necessary, I created a non-privileged dylan user as done in the tutorial, and copied the configuration.
sudo cp /etc/kubernetes/admin.conf $HOME/
sudo chown $(id -u):$(id -g) $HOME/admin.conf
export KUBECONFIG=$HOME/admin.conf

echo "export KUBECONFIG=$HOME/admin.conf" | tee -a ~/.bashrc
Once that was done, I was able to configure networking using kubectl.
dylan@coreostesting:/root$ kubectl apply -f https://raw.githubusercontent.com/coreos/flannel/master/Documentation/kube-flannel.yml
clusterrole.rbac.authorization.k8s.io "flannel" created
clusterrolebinding.rbac.authorization.k8s.io "flannel" created
serviceaccount "flannel" created
configmap "kube-flannel-cfg" created
daemonset.extensions "kube-flannel-ds" created
dylan@coreostesting:/root$ kubectl apply -f https://raw.githubusercontent.com/coreos/flannel/master/Documentation/k8s-manifests/kube-flannel-rbac.yml
clusterrole.rbac.authorization.k8s.io "flannel" configured
clusterrolebinding.rbac.authorization.k8s.io "flannel" configured
I then ran kubectl taint nodes --all node-role.kubernetes.io/master- so that I could run this all on a single machine (a real deployment would have many more). Amazingly, the output of kubectl get all --namespace=kube-system seemed to be working perfectly. Perhaps I’ll revisit CoreOS again, but this was going much smoother. I skipped over much of the rest of the tutorial and decided to try to get the Web UI working. I executed the following command:
kubectl create -f https://raw.githubusercontent.com/kubernetes/dashboard/master/src/deploy/recommended/kubernetes-dashboard.yaml
Then I returned to the blog post and started up the kubectl proxy on the bare-metal machine and tunneled through the machine on my local host, this time usinig teh public IP address of the machine. The command looks like this:
ssh -L 8001:127.0.0.1:8001 -N root@[public ip]
Unfortunately when I loaded the URL for the localhost:8001 from the post http://localhost:8001/ui/, I got a wall of text:
{
  "paths": [
    "/apis",
    "/apis/",
    "/apis/apiextensions.k8s.io",
    "/apis/apiextensions.k8s.io/v1beta1",
    "/healthz",
    "/healthz/etcd",
    "/healthz/ping",
    "/healthz/poststarthook/generic-apiserver-start-informers",
    "/healthz/poststarthook/start-apiextensions-controllers",
    "/healthz/poststarthook/start-apiextensions-informers",
    "/metrics",
    "/openapi/v2",
    "/swagger-2.0.0.json",
    "/swagger-2.0.0.pb-v1",
    "/swagger-2.0.0.pb-v1.gz",
    "/swagger.json",
    "/swaggerapi",
    "/version"
  ]
}
I tracked down the GitHub repository for the dashboard, and realized that the URL needed to be http://localhost:8001/api/v1/namespaces/kube-system/services/https:kubernetes-dashboard:/proxy/. I finally had it mostly working. I was able to access the Web UI at least. I decided to tear down the server as it is quite pricey to keep online for more than several hours at a time. Next time I will explore setting up something without using cloud resources, and explore running a containerized workload on top of the Kubernetes software.